AppPerfect Product Installation Guide
You will need administrator rights on Windows machines and root access on Linux machine to install AppPerfect products. If you do not have these privileges, please contact your system administrator. Instructions given below are Windows-specific; if you are using a non-Windows machine, please use equivalent commands / instructions.
Note: If you are using Windows Server 2012 R2 or Windows Server 2008 R2 SP1. Please update your system using “Control Panel > System and Security > Windows Update”.
- Installation instructions for AppPerfect products (Web Test, Load Test).
- Installation instructions for AppPerfect Test Manager product.
- Installation instructions for AppPerfect Agentless Monitor product.
UI-based Installation for AppPerfect products (Web Test, Load Test)
Instructions given below uses AppPerfect Load Test product, if you are using a different product, except the name of the product and its default values, all other things should match exactly). If you have downloaded zipped version of the installer (for e.g. AppPerfectLoadTest1450_win.zip, AppPerfectLoadTest1450_lnx.zip), extract the zip file to some temporary location. Launch AppPerfect installer by double-clicking on the downloaded executable file (e.g. AppPerfectLoadTest1450_win.exe, AppPerfectLoadTest1450_lnx.sh, etc). A wizard will show up and take you through the installation process. The various tabs are described below.
- Introduction:
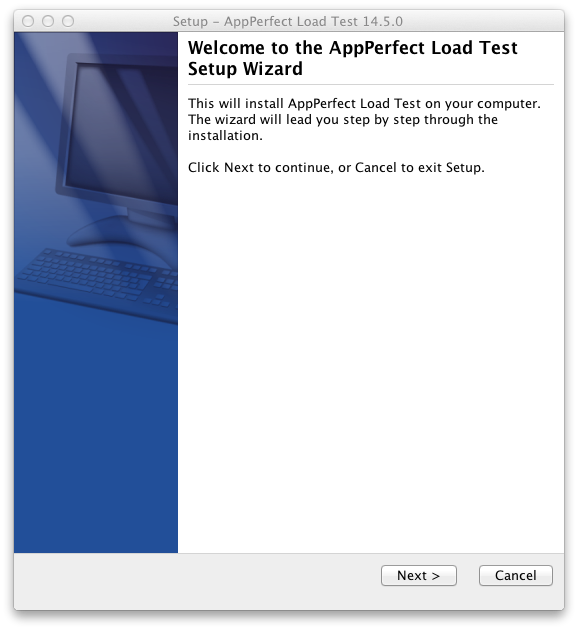
- Please go through the "Introduction" screen. This will brief you about the installation process and details about the AppPerfect product and its version that will be installed. Click on the "Next" button.
- License Agreement:
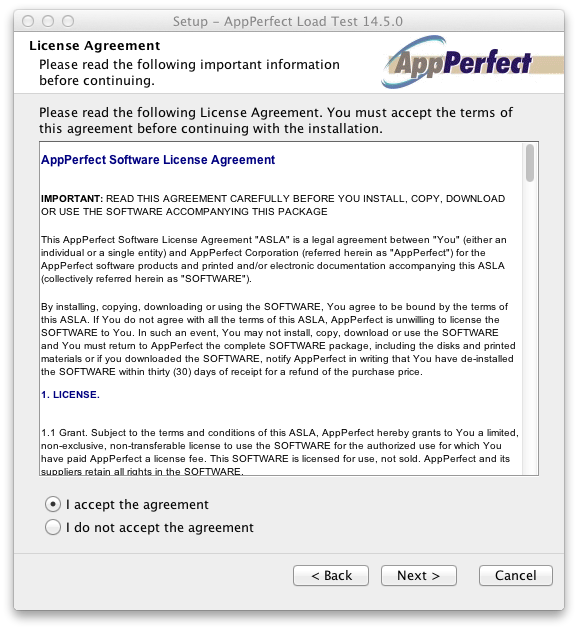
- Read the AppPerfect Software License Agreement (ASLA) carefully.
- If you do not agree, click on Cancel and do not proceed.
- If you agree to all terms of the ASLA, select "I accept the agreement" which will enable "Next" button. Click the "Next" button to proceed further.
- Select Destination Directory:
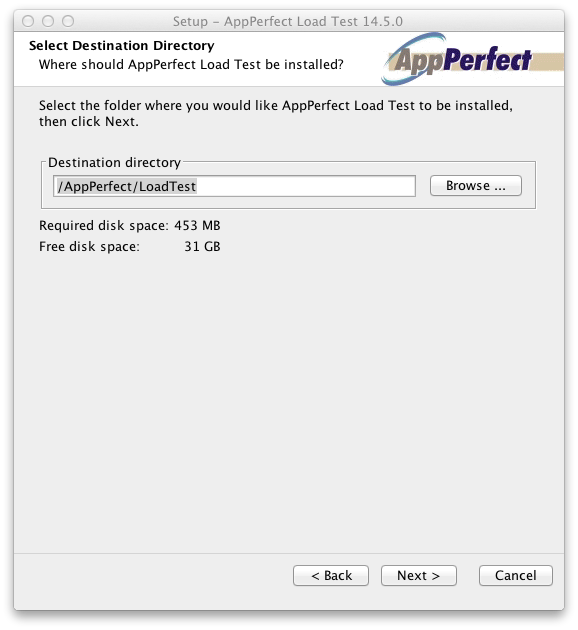
- Select a folder where you wish to install AppPerfect. We recommend using the default installation folder selected by AppPerfect.
- To specify your own location click on the button "Browse..." and select a location for installation. Click on the "Next" button to proceed further.
- If the directory already exists, it will prompt you "The directory already exists. Would you like to install to that directory anway?". If No, choose another location or select Yes.
- External Applications:

- Specify the AppPerfect Service port settings. The AppPerfect Service requires two ports: one for startup and one for shutdown. We recommend using the default ports provided by AppPerfect.
- Next specify ports for demo server.Demo server requires two ports: one for startup and one for shutdown.
- Next specify proxy server port. Proxy is used to record/replay test events.
- If the specified ports are blocked, installer will show an error message for the same. Please specify different port in such cases.
- The installer automatically detects the default Web browser's path and displays it in the "Browser Path" field. If you want to change browser then click on "Browse..." button and select the browser you want AppPerfect to use. Click on the "Next" button to proceed further.
- Choose Shortcut Folder:
- There are a number of options available for creating application shortcuts. Select option where you want to create the application shortcuts. You can also choose if you want to create shortcuts for All Users or only for the logged in user.
- It is recommended that you use the default selection. Click on the "Next" button to proceed further.
- Installing:
- This tab displays progress of the installation.
- Note: Sometimes, user face internet connection problems while downloading installer, which results in incorrect downloading of the installer. This results in showing error during installation of the type "Unable to extract xxx file. Would you like to continue... installation". Even on selecting Retry button, it continues to flash same message. Please download the installer again, use a reliable download manager software which allows you to continue downloading a big file even when there is a connection break in between. For e.g. FlashGet, GetRight etc. You can also download using Firefox, Chrome browsers.
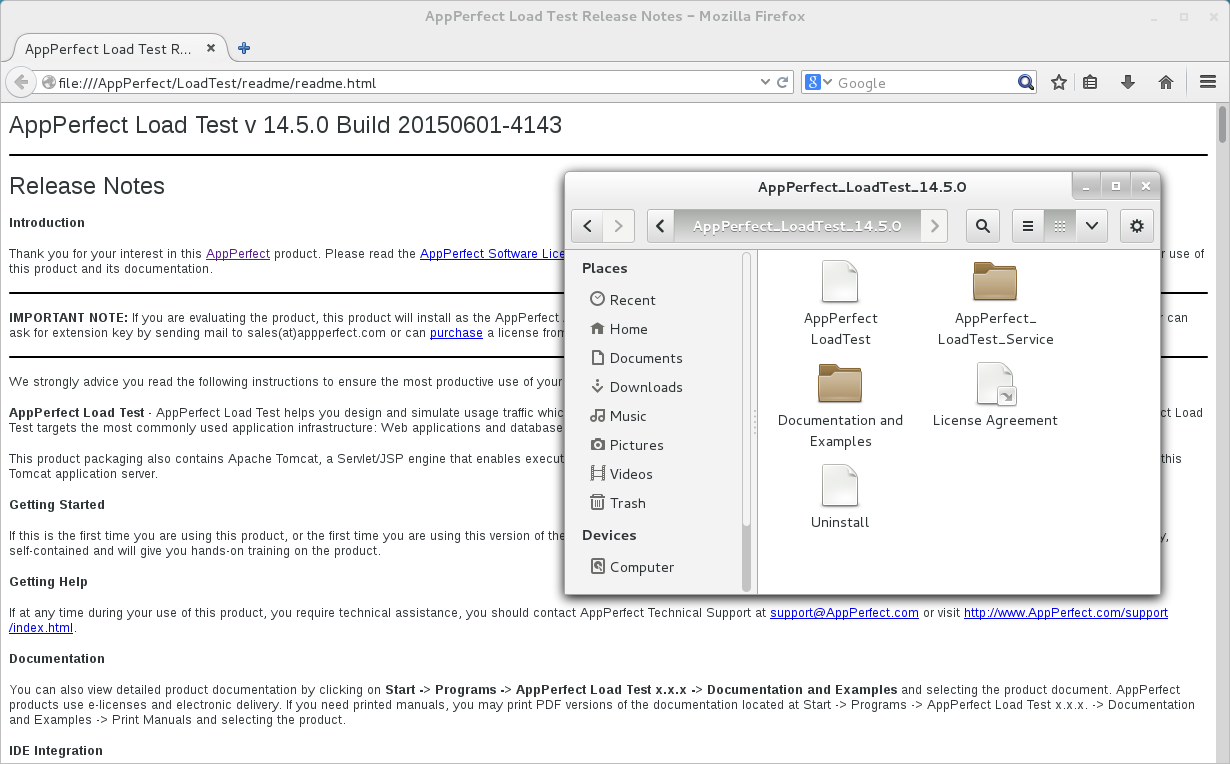
- Installation Complete:
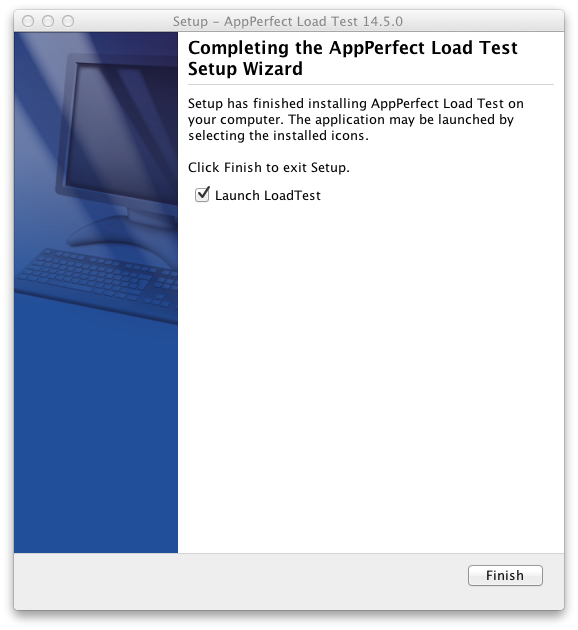
- On successful installation a message of finished installing AppPerfect product on your computer is displayed. Click on the "Finish" button.
- Use "Launch" checkbox to directly launch product.
- A "Readme" file will be launched in a browser. Read me file provides the information on the version and build of the product installed on the machine.
- If shortcuts were installed, then the shortcut folder should be opened in a new Explorer (or equivalent).
NOTE (Windows 2000/XP/2003/Vista/Windows 7): On windows operating system for Non-Admin
users AppPerfect product may not work correctly. This happens due to insufficient read/write permissions of install folder. We recommend to set Everyone read/write permissions to install folder and its sub-folders/files so that all users can use AppPerfect product. Please contact your system administrator for assistance.
We recommend
that before installing product you create a install folder for AppPerfect say "C:\AppPerfect" and set Everyone
read/write permissions to this folder. Now during installation select this folder as install folder for AppPerfect
Products. Once read/write permissions are set for the folder then all files and sub-folders in this folder will
automatically have proper permissions set.
Also take care to create workspace location inside this install
folder only otherwise AppPerfect product may not work correctly due to insufficient read/write permissions to workspace
location and its sub-folders/files.
Console-based installation (for headless Unix boxes) for AppPerfect Products (App Test, Web Test, Load Test, Java Code Test, Java Unit Test, Java Profiler)
If you have downloaded zipped version of the installer (for e.g. AppPerfectLoadTest1450_lnx.zip), extract the zip file to some temporary location. To launching AppPerfect installer in console mode. Open a Terminal window and navigate to the directory where
the AppPerfect installer file (e.g. AppPerfectLoadTest1450_lnx.sh etc.) is extracted/downloaded. For the purpose of this document, let us assume that you have logged in using username user. Please create AppPerfect folder in /home/user directory if it does not exist. Now create LoadTest folder in /home/user/AppPerfect directory.
Open a terminal window and change the current directory to the location when you have extracted AppPerfect installer. Now type the command "./AppPerfectLoadTest1450_lnx.sh -q -dir /home/user/AppPerfect/LoadTest" and press the Enter key. By doing this we are instructing the installer to install the product in /home/user/AppPerfect/LoadTest directory in console mode.
This will launch the AppPerfect installer in console mode. The installer consists of a series of steps as described below.
- License Agreement:
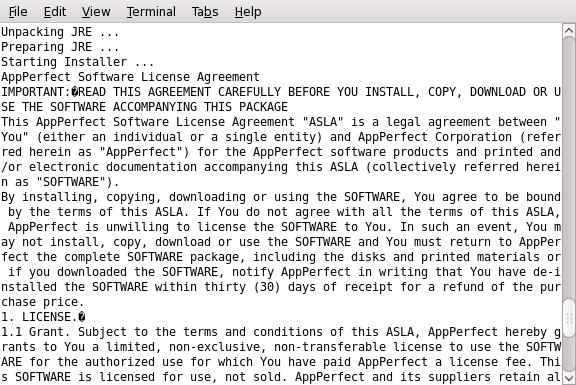
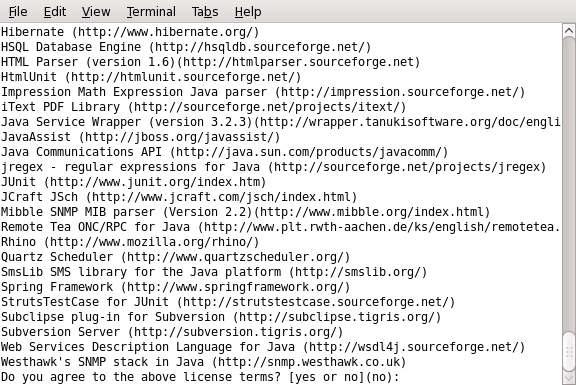
- Read the AppPerfect Software License Agreement (ASLA) carefully. Press Enter for next paragraph untill A message asking "Do you agree to the above license terms? [yes or no](no):" will be displayed.
- If you agree to all terms of the ASLA, type "yes" and press the <ENTER> key to continue. If you do not agree, type "no" and press the <ENTER> key to abort the installation process.
- Choose Link Location:
- There are many options available for creating application links. A message asking "Do you want to create links? Choose Options [y/n](yes)" will be displayed.
- If you want to create link type "y" and press the <ENTER> key to continue.
- If you have selected yes, next step will ask for the location to create the links. please provide the location where you want links to be created and press the <ENTER> key to continue.
- Service ports:
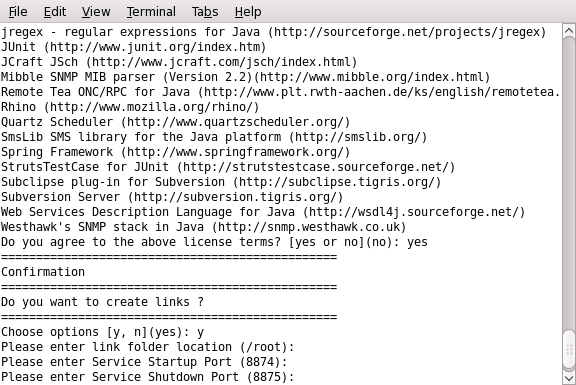
- Specify the AppPerfect Service port settings. The AppPerfect Service requires two ports: one for startup and one for shutdown. We recommend using the default ports provided by AppPerfect.
- Next specify ports for demo server.Demo server requires two ports: one for startup and one for shutdown.
- Next specify proxy server port. Proxy is used to record/replay test events.
- If the specified ports are blocked, installer will show an error message for the same. Please specify different port in such cases.
- Installing:
- The installer will now install the AppPerfect product at the specified location.
- Once the installation is complete you will get back to the command prompt.
- You can start the AppPerfect Load Test service by running the shell file ./start_service.sh
Settings that should be provided when AppPerfect product is started for the first time
Start the product using the links created during installation. On Windows machine, select Start >> Programs >> AppPerfect Load Test 15.0.0 >> AppPerfect Load Test. On Unix based machines (Linux, MAC OS X etc) Double click AppPerfect LoadTest link from the links folder i.e. AppPerfect_LoadTest_15.0.0.
- Select workspace:
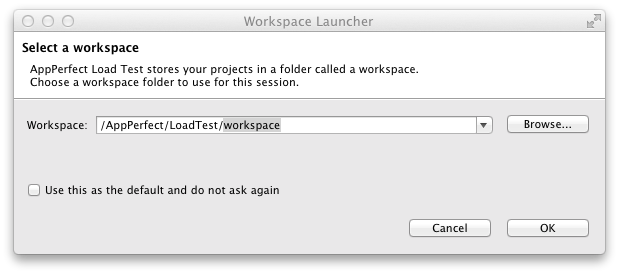
When you start the product for the first time, the first thing it will ask for is the directory where it can create & store all its settings, projects etc. It is called as a workspace. Select the default location. Select "Use this as a default and do not ask again" check box if you do not want AppPerfect to prompt for the workspace location when the product is started every time. - Configure License:
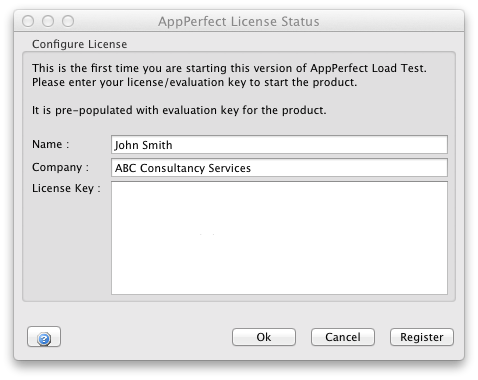
When you start the product for the first time, it will ask you to configure license. Provide your name and company in respective field. If you are evaluating the product, you might have received the evaulation key by email to the email address provided while registering with AppPerfect web-site.
If you have purchased the license, select "Get Key" button to launch your email client with required subject and message. You can add more contents to the message and send it to sales(at)AppPerfect.com to receive a valid license key for your desktop.
Note: If you enter a wrong key or a key of different AppPerfect product, you will get a message "License key is invalid. Please enter a valid key". This typically happens, when users register for one product, but download and install another product. For e.g. If one registers for AppPerfect Load Test, AppPerfect's automated tool will send an evaluation key for AppPerfect Load Test. But if one downloads a product using incorrect link (e.g. downloads AppPerfect Web Test), and tries to enter license key sent by AppPerfect, it will give License invalid error. To rectify this error, please download the product for which you requested an evaluation key from AppPerfect.
AppPerfect Test Manager (UI-based Installation)
If you have downloaded zipped version of the installer (for e.g. AppPerfectTestManager1450_win.zip, AppPerfectTestManager1450_lnx.zip), extract the zip file to some temporary location. Launch AppPerfect installer by double-clicking on the downloaded executable file (e.g. AppPerfectTestManager1450_win.exe, AppPerfectTestManager1450_lnx.sh, etc). A wizard will show up and take you through the installation process. The various tabs are described below.
- Introduction:
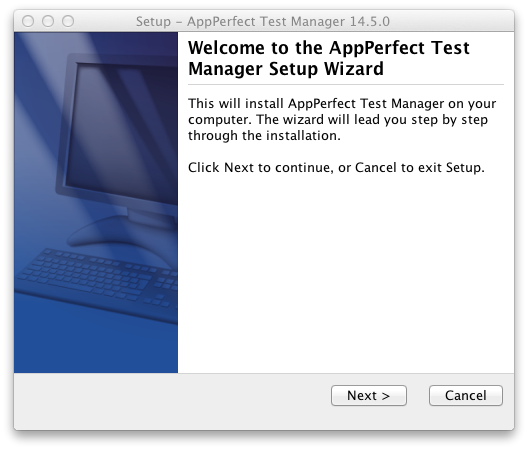
- Please go through the "Introduction" screen. This will brief you about the installation process and details about the AppPerfect Test Manager and its version that will be installed. Click on the "Next" button.
- License Agreement:
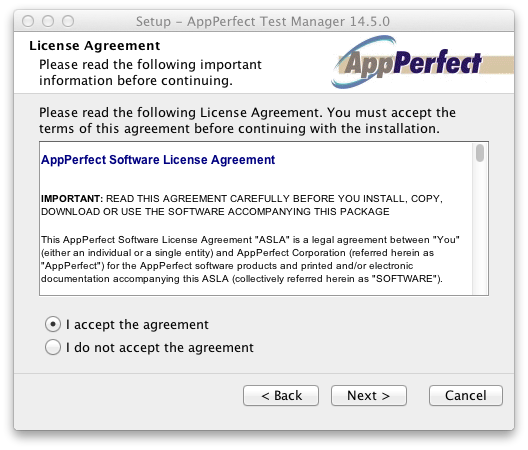
- Read the AppPerfect Software License Agreement (ASLA) carefully.
- If you do not agree, click on Cancel and do not proceed.
- If you agree to all terms of the ASLA, select "I accept the agreement" which will enable "Next" button. Click the "Next" button to proceed further.
- Select Destination Directory:
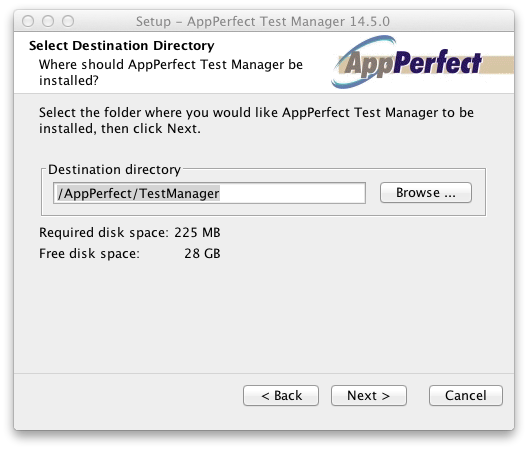
- Select a folder where you wish to install AppPerfect. We recommend using the default installation folder selected by AppPerfect.
- To specify your own location click on the button "Browse..." and select a location for installation. Click on the "Next" button to proceed further.
- If the directory already exists, it will prompt you "The directory already exists. Would you like to install to that directory anway?". If No, choose another location or select Yes.
- Test Manager Settings:
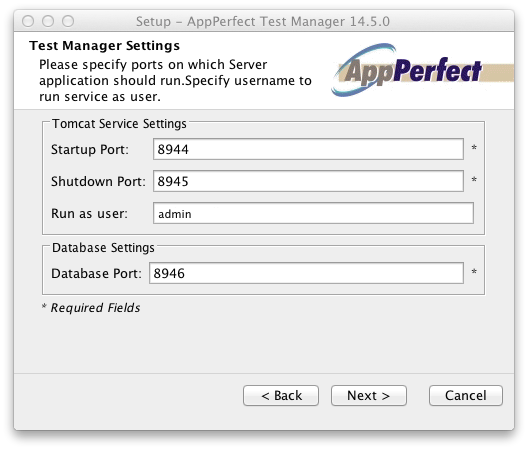
- Specify the Service port & Database settings. The Test Manager Service requires two ports: one for startup and one for shutdown.
- Test Manager product also requires a port on which database is run
- We recommend using the default ports provided by AppPerfect. If the specified ports are blocked, installer will show an error message for the same. Please specify different port in such cases.
- Choose Shortcut Folder:
- There are a number of options available for creating application shortcuts. Select option where you want to create the application shortcuts. You can also choose if you want to create shortcuts for All Users or only for the logged in user.
- It is recommended that you use the default selection. Click on the "Next" button to proceed further.
- Installing:
- This tab displays progress of the installation.
- Note: Sometimes, user face internet connection problems while downloading installer, which results in incorrect downloading of the installer. This results in showing error during installation of the type "Unable to extract xxx file. Would you like to continue... installation". Even on selecting Retry button, it continues to flash same message. Please download the installer again, use a reliable download manager software which allows you to continue downloading a big file even when there is a connection break in between. For e.g. FlashGet, GetRight etc. You can also download using Firefox, Chrome browsers.
- Installation Complete:
- On successful installation a message of finished installing AppPerfect Test Manager on your computer is displayed. Click on the "Finish" button.
- A "Readme" file will be launched in a browser. Read me file provides the information on the version and build of the AppPerfect Test Manager installed on the machine.
- If shortcuts were installed, then the shortcut folder should be opened in a new Explorer (or equivalent).
NOTE (Windows 2000/XP/2003/Vista/7): On windows operating system for Non-Admin
users AppPerfect product may not work correctly. This happens due to insufficient read/write permissions of install folder. We recommend to set Everyone read/write permissions to install folder and its sub-folders/files so that all users can use AppPerfect product. Please contact your system administrator for assistance.
We recommend
that before installing product you create a install folder for AppPerfect say "C:\AppPerfect" and set Everyone read/write permissions to this folder. Now during installation select this folder as install folder for AppPerfect Products. The reason to follow this approach is then all files and sub-folders in this folder will automatically have proper permissions set.
AppPerfect Test Manager (Console-based installation for headless Unix boxes)
If you have downloaded zipped version of the installer (for e.g. AppPerfectTestManager1450_lnx.zip), extract the zip file to some temporary location. To launching AppPerfect installer in console mode. Open a Terminal window and navigate to the directory where
the AppPerfect installer file (e.g. AppPerfectTestManager1450_lnx.sh etc.) is extracted/downloaded. For the purpose of this document, let us assume that you have logged in using username user. Please create AppPerfect folder in /home/user directory if it does not exist. Now create LoadTest folder in /home/user/AppPerfect directory.
Open a terminal window and change the current directory to the location when you have extracted AppPerfect installer. Now type the command "./AppPerfectTestManager1450_lnx.sh -q -dir /home/user/AppPerfect/TestManager" and press the Enter key. By doing this we are instructing the installer to install the product in /home/user/AppPerfect/TestManager directory in console mode.
This will launch the AppPerfect installer in console mode. The installer consists of a series of steps as described below.
- License Agreement:
- Read the AppPerfect Software License Agreement (ASLA) carefully. Press Enter for next paragraph untill A message asking "Do you agree to the above license terms? [yes or no](no):" will be displayed.
- If you agree to all terms of the ASLA, type "yes" and press the <ENTER> key to continue. If you do not agree, type "no" and press the <ENTER> key to abort the installation process.
- Choose Link Location:
- There are many options available for creating application links. A message asking "Do you want to create links? Choose Options [y/n](yes)" will be displayed.
- If you want to create link type "y" and press the <ENTER> key to continue.
- If you have selected yes, next step will ask for the location to create the links. please provide the location where you want links to be created and press the <ENTER> key to continue.
- Installing:
- The installer will now install the AppPerfect product at the specified location.
- Once the installation is complete you will get back to the command prompt.
- It will launch Read me file in the default browser.
- If links were created, then the folder should be opened in a new Explorer (or equivalent).
Settings that should be provided when you login into AppPerfect Test Manager for the first time
Start the product using the links created during installation. On Windows machine, select Start >> Programs >> AppPerfect Test Manager 15.0.0 >> AppPerfect Test Manager Login. On Unix based machines (Linux, MAC OS X etc) Double click AppPerfect Test Manager Login link from the links folder i.e. AppPerfect_TestManager_15.0.0.
- Configure Test Manager:
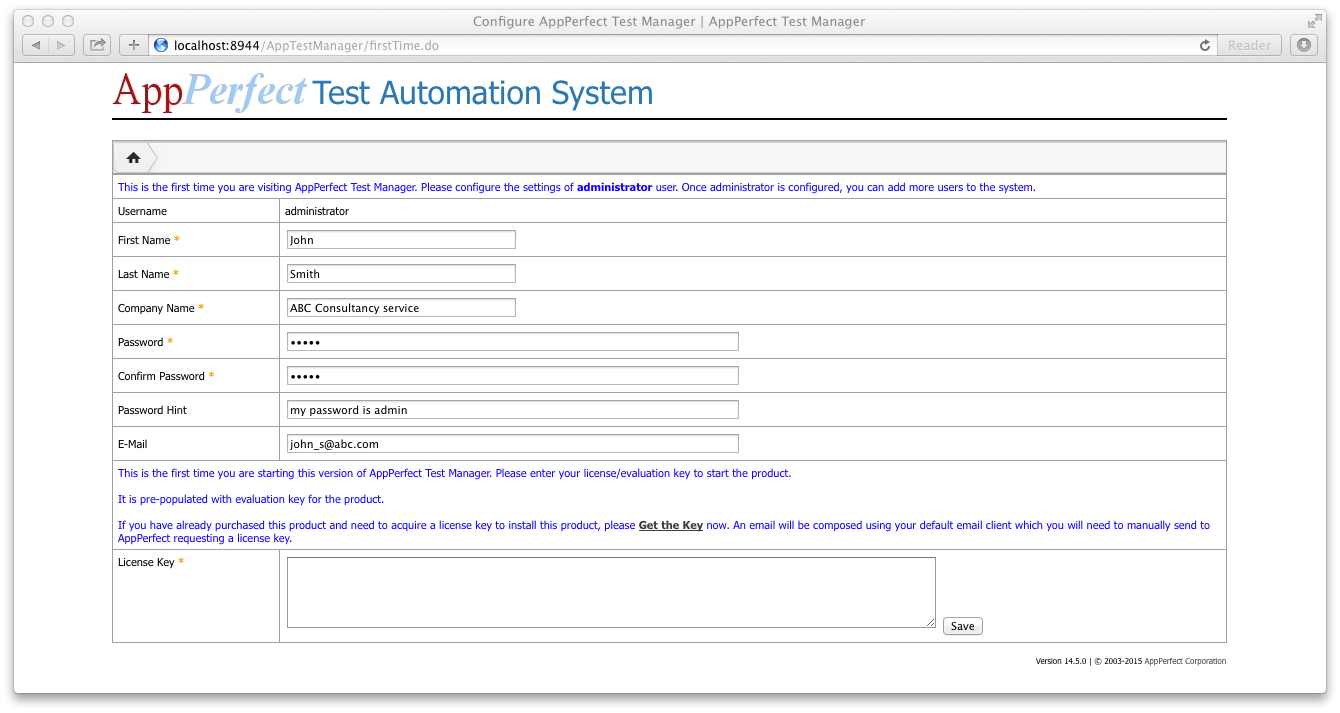
When you start the product for the first time, it will ask you to Configure Test Manager. Provide your first name, last name, company in respective field. Provide the password for administrator user. Provide other details in this form. If you are evaluating the product, you might have received the evaulation key by email to the email address provided while registering with AppPerfect web-site.
Note: If you enter a wrong key or a key of different AppPerfect product, you will get a message "License key is invalid. Please enter a valid key". This typically happens, when users register for one product, but download and install another product. For e.g. If one registers for AppPerfect Test Manager, AppPerfect's automated tool will send an evaluation key for AppPerfect Test Manager. But if one downloads a product using incorrect link (e.g. downloads AppPerfect Web Test), and tries to enter license key sent by AppPerfect, it will give License invalid error. To rectify this error, please download the product for which you requested an evaluation key from AppPerfect.
AppPerfect Agentless Monitor (UI-based Installation)
If you have downloaded zipped version of the installer (for e.g. AppPerfectAgentlessMonitor1450_win.zip, AppPerfectAgentlessMonitor1450_lnx.zip), extract the zip file to some temporary location. Launch AppPerfect installer by double-clicking on the downloaded executable file (e.g. AppPerfectAgentlessMonitor1450_win.exe, AppPerfectAgentlessMonitor1450_lnx.sh, etc). A wizard will show up and take you through the installation process. The various tabs are described below.
- Introduction:
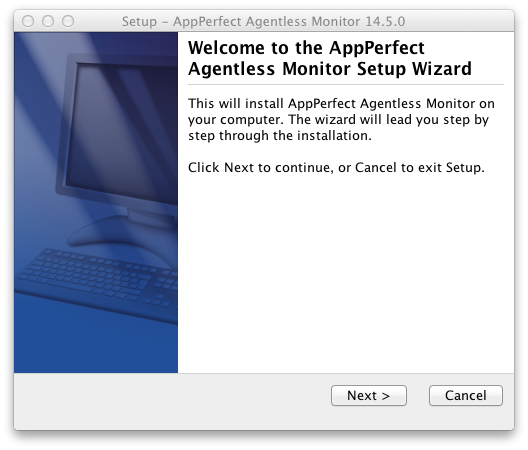
- Please go through the "Introduction" screen. This will brief you about the installation process and details about the AppPerfect Agentless Monitor and its version that will be installed. Click on the "Next" button.
- License Agreement:

- Read the AppPerfect Software License Agreement (ASLA) carefully.
- If you do not agree, click on Cancel and do not proceed.
- If you agree to all terms of the ASLA, select "I accept the agreement" which will enable "Next" button. Click the "Next" button to proceed further.
- Select Destination Directory:
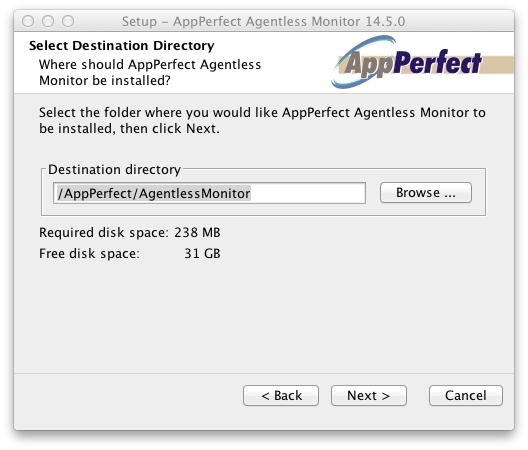
- Select a folder where you wish to install AppPerfect. We recommend using the default installation folder selected by AppPerfect.
- To specify your own location click on the button "Browse..." and select a location for installation. Click on the "Next" button to proceed further.
- If the directory already exists, it will prompt you "The directory already exists. Would you like to install to that directory anway?". If No, choose another location or select Yes.
- Agentless Monitor Settings:
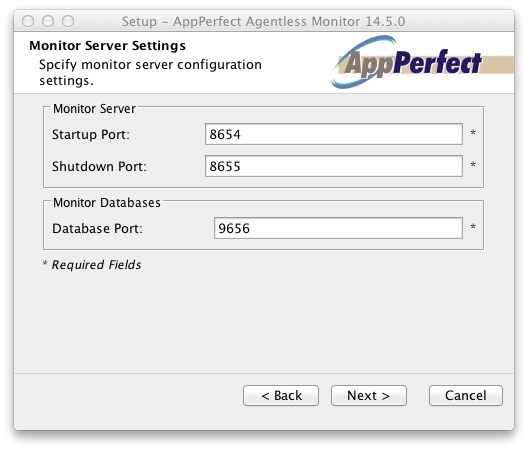
- Agentless Monitor Server requires two ports: one for startup and one for shutdown.
- Agentless Monitor requires three database ports: one for active database, one for archive database and one for scheduler database. We recommend using the default ports provided by AppPerfect.
- We recommend using the default ports provided by AppPerfect. If the specified ports are blocked, installer will show an error message for the same. Please specify different port in such cases.
- Choose Shortcut Folder:
- There are a number of options available for creating application shortcuts. Select option where you want to create the application shortcuts. You can also choose if you want to create shortcuts for All Users or only for the logged in user.
- It is recommended that you use the default selection. Click on the "Next" button to proceed further.
- Installing:
- This tab displays progress of the installation.
- Note: Sometimes, user face internet connection problems while downloading installer, which results in incorrect downloading of the installer. This results in showing error during installation of the type "Unable to extract xxx file. Would you like to continue... installation". Even on selecting Retry button, it continues to flash same message. Please download the installer again, use a reliable download manager software which allows you to continue downloading a big file even when there is a connection break in between. For e.g. FlashGet, GetRight etc. You can also download using Firefox, Chrome browsers.
- Installation Complete:
- On successful installation a message of finished installing AppPerfect Agentless Monitor on your computer is displayed. Click on the "Finish" button.
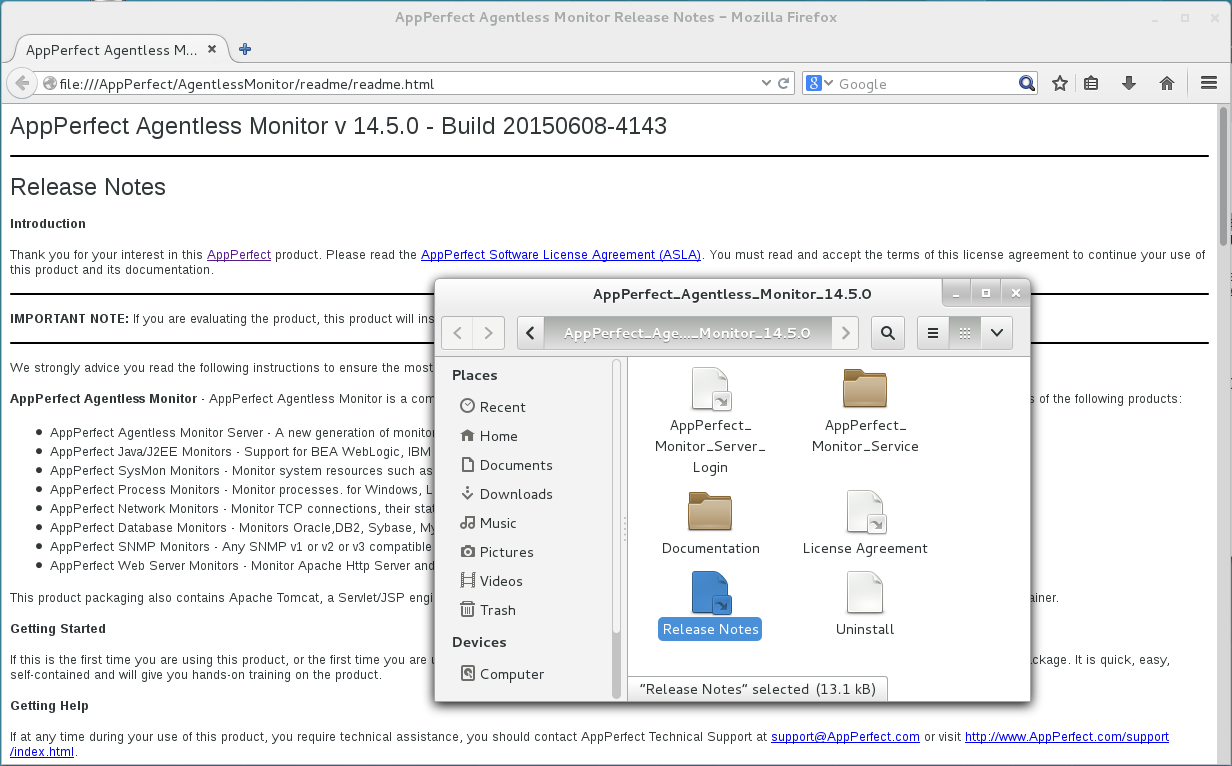
- A "Readme" file will be launched in a browser. Read me file provides the information on the version and build of the AppPerfect Agentless Monitor installed on the machine.
- If shortcuts were installed, then the shortcut folder should be opened in a new Explorer (or equivalent).
NOTE (Windows 2000/XP/2003/Vista/7): On windows operating system for Non-Admin
users AppPerfect product may not work correctly. This happens due to insufficient read/write permissions of install folder. We recommend to set ëEveryoneí read/write permissions to install folder and its sub-folders/files so that all users can use AppPerfect product. Please contact your system administrator for assistance.
We recommend
that before installing product you create a install folder for AppPerfect say "C:\AppPerfect" and set ëEveryoneí read/write permissions to this folder. Now during installation select this folder as install folder for AppPerfect Products. The reason to follow this approach is then all files and sub-folders in this folder will automatically have proper permissions set.
AppPerfect Agentless Monitor (Console-based installation for headless Unix boxes)
If you have downloaded zipped version of the installer (for e.g. AppPerfectAgentlessMonitor1450_lnx.zip), extract the zip file to some temporary location. To launching AppPerfect installer in console mode. Open a Terminal window and navigate to the directory where
the AppPerfect installer file (e.g. AppPerfectAgentlessMonitor1450_lnx.sh etc.) is extracted/downloaded. For the purpose of this document, let us assume that you have logged in using username user. Please create AppPerfect folder in /home/user directory if it does not exist. Now create LoadTest folder in /home/user/AppPerfect directory.
Open a terminal window and change the current directory to the location when you have extracted AppPerfect installer. Now type the command "./AppPerfectAgentlessMonitor1450_lnx.sh -q -dir /home/user/AppPerfect/AgentlessMonitor" and press the Enter key. By doing this we are instructing the installer to install the product in /home/user/AppPerfect/AgentlessMonitor directory in console mode.
This will launch the AppPerfect installer in console mode. The installer consists of a series of steps as described below.
- License Agreement:
- Read the AppPerfect Software License Agreement (ASLA) carefully. Press Enter for next paragraph untill A message asking "Do you agree to the above license terms? [yes or no](no):" will be displayed.
- If you agree to all terms of the ASLA, type "yes" and press the <ENTER> key to continue. If you do not agree, type "no" and press the <ENTER> key to abort the installation process.
- Choose Link Location:
- There are many options available for creating application links. A message asking "Do you want to create links? Choose Options [y/n](yes)" will be displayed.
- If you want to create link type "y" and press the <ENTER> key to continue.
- If you have selected yes, next step will ask for the location to create the links. please provide the location where you want links to be created and press the <ENTER> key to continue.
- Installing:
- The installer will now install the AppPerfect product at the specified location.
- Once the installation is complete you will get back to the command prompt.
- It will launch Read me file in the default browser.
- If links were created, then the folder should be opened in a new Explorer (or equivalent).
Settings that should be provided when you login into AppPerfect Agentless Monitor for the first time
Start the server using the links created during installation. On Windows machine, select Start >> Programs >> AppPerfect Agentless Monitor 15.0.0 >> AppPerfect Monitor Server >> Start. On Unix based machines (Linux, MAC OS X etc) open AppPerfect Monitor Server folder and Start link from the links folder i.e. AppPerfect_AgentlessMonitor_15.0.0.
Open the Login page using the links created during installation. On Windows machine, select Start >> Programs >> AppPerfect Agentless Monitor 15.0.0 >> AppPerfect Monitor Server Login. On Unix based machines (Linux, MAC OS X etc) open AppPerfect Monitor Server Login link from the links folder i.e. AppPerfect_AgentlessMonitor_15.0.0.
- Configure Agentless Monitor:

When you start the product for the first time, it will ask you to Configure Agentless Monitor. Provide your first name, last name, company in respective field. Provide the password for administrator user. Provide other details in this form. If you are evaluating the product, you might have received the evaulation key by email to the email address provided while registering with AppPerfect web-site.
Note: If you enter a wrong key or a key of different AppPerfect product, you will get a message "License key is invalid. Please enter a valid key". This typically happens, when users register for one product, but download and install another product. For e.g. If one registers for AppPerfect Agentless Monitor, AppPerfect's automated tool will send an evaluation key for AppPerfect Agentless Monitor. But if one downloads a product using incorrect link (e.g. downloads AppPerfect Web Test), and tries to enter license key sent by AppPerfect, it will give License invalid error. To rectify this error, please download the product for which you requested an evaluation key from AppPerfect.